
 By
Emily Krings
By
Emily Krings
Live streaming is an essential channel for any business looking to build brand awareness and actively grow engagement with their audience. In the corporate world, live streams may include everything from a keynote address or product launch to an interactive webinar or online training.
But if you really want to make the most out of your organization’s live stream content efforts, then it’s worth considering multi-camera live streaming. This approach has a lot of benefits over single-camera setups.
Ready to learn more? We’ll dive into the reasons why – along with a step by step process for getting started – in this ultimate guide to multi camera live streaming.
Table of Contents
- What is Multi-Camera Live Streaming?
- Why Have a Multi-Camera Live Streaming Setup?
- 4 Steps for Multiple Camera Streaming
- Putting It All Together
- Maestro: Your Multi-Camera Live Stream Solution
What is Multi-Camera Live Streaming?

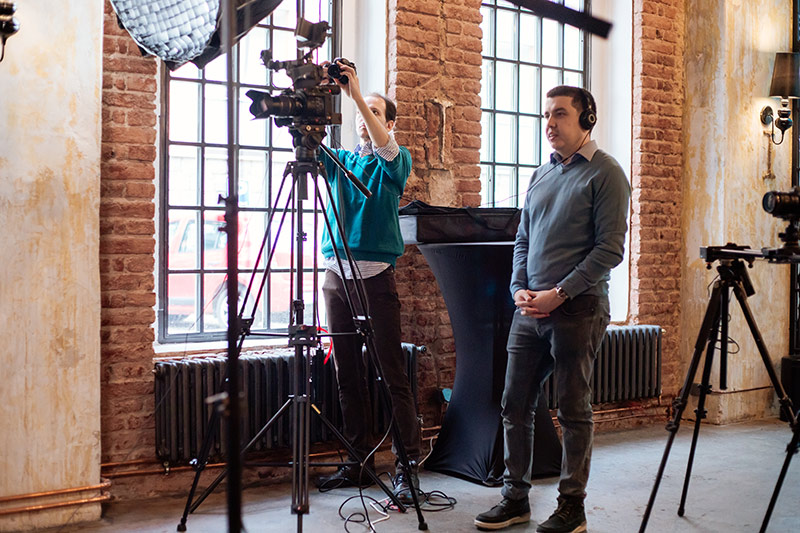
Multi-camera live streaming is a live video broadcast involving the use of multiple cameras to capture and stream live video from different angles at the same time.
Each camera is placed to cover various aspects of an event or scene, routed through a video switcher that lets your operator switch between camera angles in real time.
Why Have a Multi-Camera Live Streaming Setup?

There are many reasons to opt for a multi-camera live streaming setup over a single camera setup, including some you may not have thought of before.
- Greater engagement. If you’ve ever watched anything with a single camera before, you know it can get monotonous or even boring (even with B-roll thrown in over the top). Multiple camera angles add a level of dynamism and appeal that can hold viewers’ attention much better.
- Professional quality. If your production has multiple camera angles, it’ll feel a lot more like a professional television broadcast, which lends authority and credibility to your brand.
- Better coverage. If you’re holding a live event with more than one or two people, different camera angles can ensure you’re not missing any interactions or details. It also gives you flexibility in how you tell the story of an event.
There are so many ways that a multi camera streaming setup can elevate the quality of your live broadcast, similar to how a live green screen production can. If you’re serious about live streaming, it should be a given that you’ll incorporate multiple cameras into the production.
Now, let’s talk about how to do just that!
4 Steps for Multiple Camera Streaming
If you’re ready to create a multiple camera setup for streaming, read on to see our 4 steps on getting started!
1) Choose Your Equipment
The first thing you’ll need to do is make sure you have the equipment and hardware necessary for multi camera streaming.
This includes, first and foremost, multiple cameras – but there are other items you’ll likely need in order to pull off a professional multi-camera production.
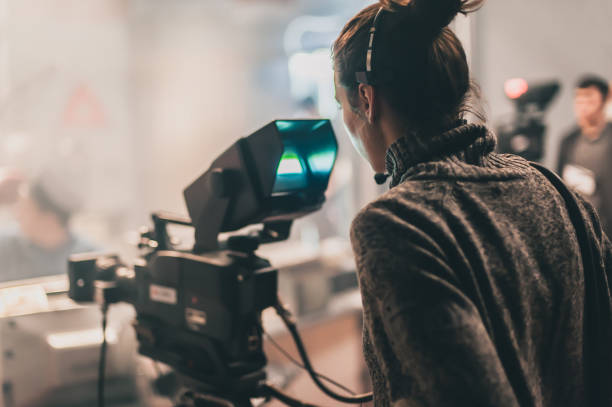
- Cameras - For a multi-camera stream, you technically need just two cameras, but three or more can give you greater flexibility. Choose between DSLR, camcorder, or pan-tilt-zoom (PTZ) cameras, but aim to have 4K cameras that are capable of 60 frames per second capture.
- Tripods - Your cameras are only as good as their placement, which is why you should consider quality tripods and mounts for every camera to get the angles you need.
- Video Switchers - Switchers allow you to manage multiple camera feeds so you can switch different angles on the fly. Hardware switchers are one option, such as the ATEM Mini Pro or the Roland V-1HD – we’ll also discuss some software switchers later in this post.
- Audio - For a professional production, you’ll need high-quality audio to go with your multiple cameras. There are lavalier microphones, shotgun microphones, and handheld microphones that you can use – and you’ll also need an audio mixer that can accommodate multiple inputs.
- Cables - While sometimes overlooked, cables and connectors are also a key factor in how well your production looks and sounds. You’ll want reliable HDMI, SDI, and XLR cables to ensure a quality signal transmission between your cameras, switcher, and other hardware.
- Lighting - Lighting gets more complex when you have more angles and subjects, so be sure you have the right lighting equipment for your production. This may include LED panels and softboxes.
- Monitoring - With a multi-camera production, keeping track of each camera angle is important, which is where external monitors come into play to help you maintain better control over the broadcast.
Only you can know the ideal mix of equipment for your production, but you can see that adding more cameras will require you to invest in more equipment overall, as well as new types of equipment like switchers, monitors, and mounts that you otherwise may not need.
2) Set Up Your Multi-Camera System
Once you have all of your equipment, you’re ready to actually set up your multi-camera system.
The main things to think about at this stage are the venue itself, camera placement, lighting, and hardware.
The Venue
First, you should walk through your venue or set to think about the ideal camera positions. Think about how many subjects will be on camera, the lighting conditions, and what areas you most want to capture.
Also, consider where there may be obstacles that could interfere, such as an internet dead zone, lack of power source, or physical barrier.
Camera Placement
If you have several cameras, you have more potential angles and shots to work with. Generally, you’ll want at least one wide shot, a medium shot that’s closer to the subject, and one or more close-up shots (including side angles).
Be aware of where the audience and presenters will be located so you can capture the proper angles without obstructing anyone’s view.
Lighting
Many venues have existing lights and natural lighting, so your first step is considering the venue’s current lighting for all of your camera feeds.
The most important function of your lighting equipment is illuminating your subjects with soft lighting for close-up shots – any harsh shadows or colors will show up prominently in those camera views.
Hardware
Lastly, you’ll need to connect all of your cameras to your computer, mixer, or video switcher using cables. It’s a good practice to label each cable so everyone knows which is which.
Configure the cameras to the same settings across resolution, frame rate, and color balance so every angle has the same quality and consistency.
Set up audio by positioning microphones near presenters and near the audience. Use a lavalier microphone for individual speakers (such as in a keynote address), and a shotgun microphone or boom microphone for multiple people on stage.
Power management is also key. All of your equipment needs reliable power sources with surge protection.
3) Find Your Streaming Software
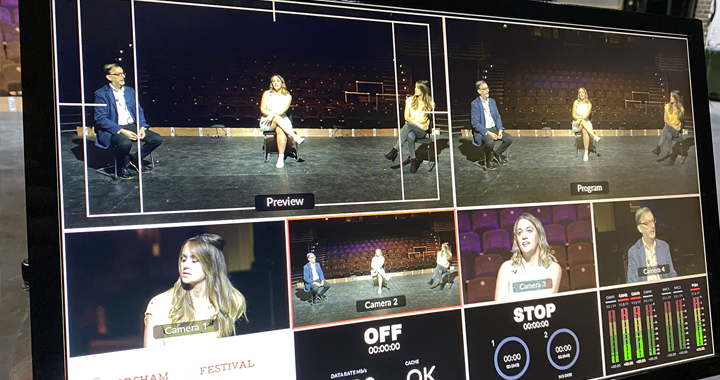
Now, it’s time to choose your streaming software. This software is a critical part of your multi-camera live stream setup, because it’s basically the entire hub for your camera feeds, audio sources, and any other media.
We recommend a few different streaming software solutions that support multi-camera streaming:
- OBS Studio - Free and open-source with support for unlimited sources. Comes with extensive plugin support for additional functionality. Works across operating systems (including Windows, Mac, and Linux).
- vMix - Advanced streaming software with support for multiple input types, plus advanced live production features for professionals.
- Wirecast - A streaming software tool that balances ease of use with advanced features. Has a user-friendly interface and does support multiple cameras and audio inputs. Comes with advanced production capabilities and a built-in encoder for live streaming.
Choosing the right streaming software comes down to your budget, as well as any other features you may want aside from multi-camera support.
4) Integrate with an Online Video Platform

Once you’re done choosing the streaming software you want to use, it’s time to integrate it with an online video platform (OVP) like Maestro to actually deliver the stream to your live audience.
With a quality OVP, you’ll have a custom-branded, professional hub online to host your live content, as well as key back-end features like security, monetization, and interactivity to ensure your multi-camera stream operates exactly how you expect it to.
In terms of configuring your streaming software and OVP, you'll need to:
- Add camera sources
- Set up audio sources
- Create scenes and transitions
- Add graphics and overlays
- Connect the stream to the OVP
- Configure monetization and security
Once your multi camera setup is ready and your software is configured, you can finally go live!
Putting It All Together

Following these 4 steps should be all you need to put on a successful multi camera live streaming production. Of course, just like any other live event, the technology is only part of the picture – it’s also important to think about the content, the on-screen talent, the marketing and promotion, and any number of other elements that can make or break your event.
But there is one wrinkle with a multi-camera production that you may not be accustomed to with a single-camera setup, and that’s editing after the event. If you’re happy with all of the camera angles used during the actual live stream, then you can distribute that recording and call it a day – but with multiple camera angles being streamed and recorded, you have the option to experiment with other camera angles afterwards to produce the best possible cut of your event, or cut it up differently for different audience segments.
In the end, we do recommend publishing your live stream recording as an on-demand video to continue getting additional value from it. Another tip is to grab clips of the same section from different angles to publish on social media – the additional camera angles can add freshness to the footage to help you get more mileage out of what you shot.
Maestro: Your Multi Camera Live Stream Solution
When you build out your multi camera live stream solution, you’ll be amazed at the higher quality of your productions. All it takes is the right know-how, equipment, and software to make it happen!
Ultimately, whatever your goals for a multi-camera live stream, Maestro is a great platform to include in your production. Our all-in-one OVP comes with robust security features, extensive branded customization options, and interactive tools that cater to enterprise-level businesses for all of your live streaming and VOD needs.
Are you ready to stream and monetize your own high-quality videos on Maestro? Contact us now to book a demo!
→ Contact us to get started
